How to Replace a Bathroom Exhaust Fan Motor?
A Bathroom Exhaust Fan Motor can become noisy, slow, or stop working, leaving steam hanging over the mirror after a shower. Replacing it may be simpler than replacing the entire fan, but the right repair depends on the unit’s design. Some fans have a removable motor-and-blade assembly. Others require more extensive work. A humming sound is not proof that the motor has failed. Dust buildup, a jammed fan wheel, or a blocked duct can cause similar symptoms. Small clues matter.
This guide explains how to identify a compatible replacement, prepare the work area, and change the motor safely. Before opening the housing, switch off power at the circuit breaker and confirm the fan is not energized. A wall switch alone is not enough. Note the brand and model number, and compare the replacement’s mounting plate, connector, and fan wheel with the existing parts. Even motors that look alike may not fit or perform alike. If wiring is damaged, the housing is difficult to reach, or you cannot verify the power is off, pause and contact a qualified electrician. That is a sensible limit, not a failure. It is also worth checking the duct and grille while the unit is open; replacing a motor will not clear a blocked vent. The steps below offer a practical path, though older or unusual fans may differ from the examples.
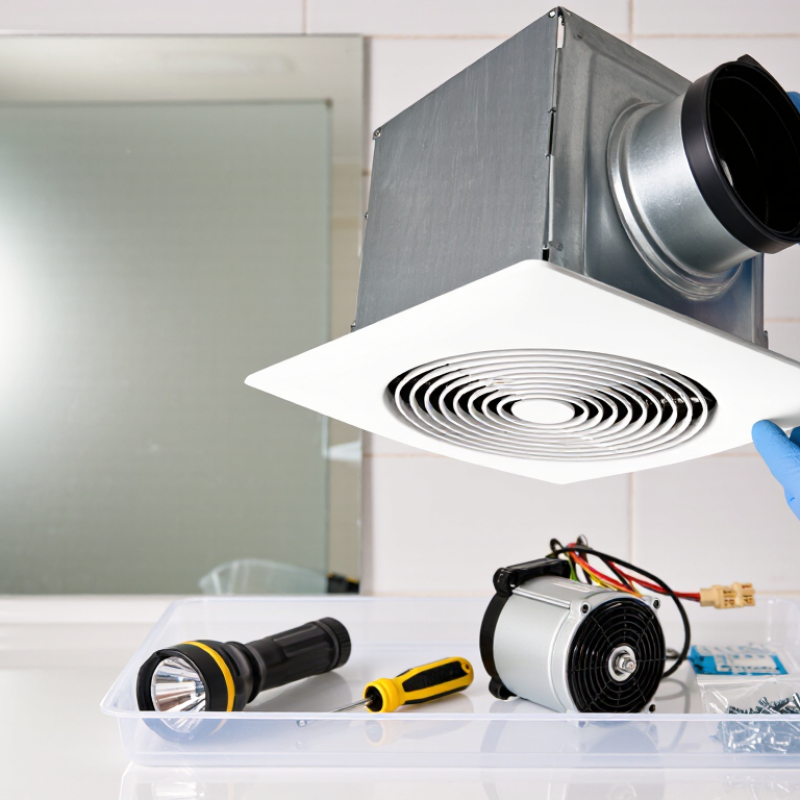
Turn Off Power and Prepare the Work Area
Before touching the fan, switch off its circuit at the breaker. Not the wall switch. A wall switch can leave wiring energized. If the breaker is not clearly labeled, ask someone to identify it rather than guessing. Confirm the power is off with a voltage tester at the fan’s wiring; check that the tester works before and after testing. If you find damaged wiring or cannot verify the circuit is dead, stop and call a qualified electrician.
Clear the floor, place a stable step ladder, and lay down a cloth to catch dust and screws. Keep the area dry, and move towels or toiletries away from the work zone. Remove the grille only after power is off, and avoid pulling on wires while inspecting the housing.
One useful check before ordering a motor: note the fan’s airflow rating and the bathroom’s size. Home Ventilating Institute guidance recommends at least 1 cubic foot per minute per square foot for bathrooms up to 100 square feet, with a 50-CFM minimum. That figure helps confirm the ventilation target, though the existing housing and motor must also be compatible.
Dust is easy to overlook. A quick cleanup before opening the unit can keep debris out of your eyes and the motor housing.
Remove the Grille and Locate the Fan Motor
Before touching the fan, switch off its circuit at the breaker, not just the wall switch. Confirm the fan is off with a voltage tester before reaching into the opening. A wall switch alone may not isolate every part. Take your time.
Place a stable step stool beneath the unit and support the grille with one hand. Many grilles pull straight down, then release from two spring clips; lower it slowly and squeeze the clips inward. If it resists, stop. A painted edge or hidden screw may be holding it in place.
With the grille removed, shine a flashlight into the opening. The motor usually sits beside the blower wheel, attached to a small metal plate or bracket inside the housing. It is easy to mistake the wheel for the motor; they are connected, but they are separate parts. Look for the motor’s connector and mounting screws, without tugging wires. Gently brush away lint if it hides the fasteners, and note how the parts sit. A clear photo can help, since the layout may be less obvious from below than expected. If reaching the motor requires disturbing ceiling wiring or ductwork, pause and check the fan’s service instructions or contact a qualified electrician.
Install the Replacement Motor and Reconnect Wiring
With the breaker off, confirm the fan circuit is de-energized before touching wires. Remove the old motor assembly and compare its mounting plate, shaft position, and connector with the replacement. Seat the new motor firmly; a slightly crooked plate can cause a persistent buzz. Reconnect wires according to the unit’s wiring diagram, matching conductors and securing each connection with an approved connector. Attach the ground wire where specified, then gently tug each connection. Do not guess at unfamiliar wiring.
Restore the grille only after checking that the fan wheel spins freely by hand. The Home Ventilating Institute recommends at least 50 cubic feet per minute for many bathrooms up to 100 square feet. ASHRAE Standard 62.2 lists 50 CFM for intermittent bathroom exhaust. These figures describe ventilation capacity, not a guarantee that every replacement motor provides it. If the fan sounds strained or airflow seems weak, recheck the installation and duct path.
Tips: Keep the wiring diagram nearby, and photograph the original connections before removal. Test the fan briefly before replacing the grille. Stop if wire colors or terminals do not match the diagram; an electrician can verify the circuit. It is tempting to rush this part. Don’t.
How to Replace a Bathroom Exhaust Fan Motor: Install and Reconnect
The bars show the order of the installation steps, not time or electrical measurements. Turn off power at the breaker and verify it is off before working. Reconnect wires according to the fan’s wiring diagram, then secure the motor assembly and test the fan.



 Email
 Whatsapp

 WeChat